Linux is a free open-source operating system that can be installed on your computer’s hard disk. Every time you install Linux, it creates an encrypted file container in the root directory called “/root/.ssh” which contains all of its files and allows remote access to this folder via SSH or OpenSSH servers.
The “how to recover deleted files in linux using rm -rf” is a process that can be used to recover lost or deleted files from the Linux operating system.
Have you ever erased essential data from your computer by accident? You’re not the only one who thinks this way. Mistakes may be expensive, such as mistakenly destroying data. The good news is that there are several techniques to restore lost data on Linux.
In this video, you’ll discover how to restore data from a Linux system that have been permanently destroyed.
Let’s get this party started!
Prerequisites
This will be a hands-on presentation in this course. If you want to follow along, make sure you have the following items on hand:
- A Linux Machine — Ubuntu 20.04 is used in this tutorial, although any Linux distribution will work.
- A user having sudo access.
Related: [Step-by-Step] How to Install Ubuntu 20.04
Getting a Deleted File Back from the Trash
It’s terrifying to delete a file by accident, particularly if it’s a project file. However, if your deleted file accidentally wound up in the Trash, you may still retrieve it with a few clicks.
- To launch your file manager, right-click on a blank spot on your Desktop and choose Show Desktop in Files from the context menu.
 Using the File Manager
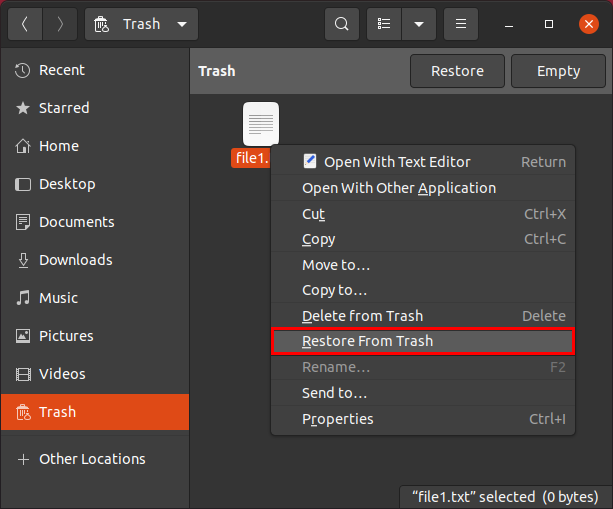
2. Select Trash from the left sidebar to access the Trash. Right-click on the file, choose Restore from Trash to recover the file and move the file back to its original location.  Getting a File Back from the Trash
 Getting a File Back from the Trash
3. Finally, go to the original location of your deleted file to examine whether it was properly restored.
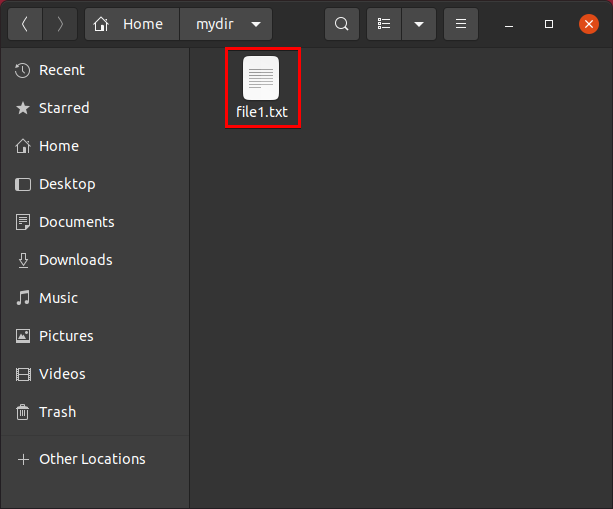 Verifying That the Deleted File Has Been Restored
Using TestDisk to Recover Permanently Deleted Files
Have you been unable to locate your file? You may have permanently erased your file by hitting Shift + Delete or using the rm command. There are other file recovery programs available, however TestDisk will be used in this article. TestDisk is a Linux command-line application that examines and recovers missing partitions, files, and other items.
On a Linux system, each file is divided into disk clusters, which are made up of disk sectors, which are the actual bits saved on the disk. When you remove a file, Linux frees up all of the clusters that were previously used to store that file to be used to store other files. Only if these clusters haven’t been replaced can TestDisk retrieve the lost data.
- To check whether TestDisk (testdisk) is installed on your system, open your terminal and type the command below.
The result reveals the executable path of TestDisk, indicating that TestDisk is already installed, as seen below.
 Checking to see if TestDisk has already been installed
If you don’t see any results, use the instructions below to install TestDisk using the apt utility and make sure it’s installed entirely.
which testdisk sudo apt install testdisk
2. To access TestDisk, use the command below.
If you haven’t ran testdisk with sudo previously, you’ll need to enter your sudo password, as seen below. The TestDisk application in your terminal will then be restarted as a privileged user by Linux.
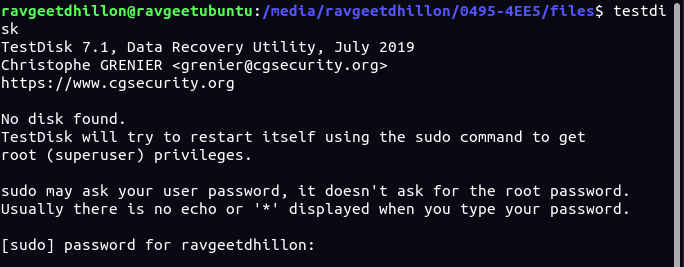 Getting to TestDisk
3. Choose Generate with the arrow keys on the TestDisk’s opening screen and hit Enter to create a log file. All of your TestDisk activities are saved in the log file.
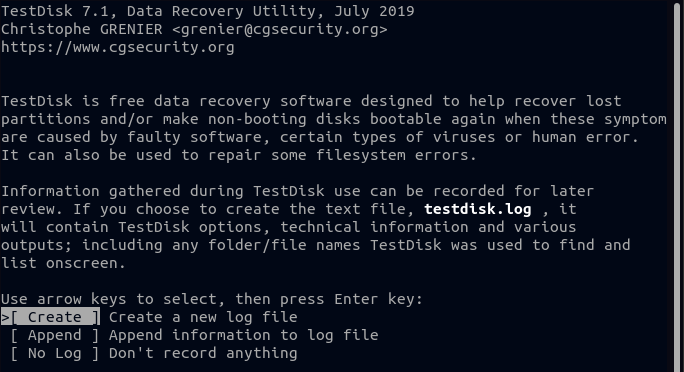 A new log file is being created.
The TestDisk interface may seem to be minimal at first glance, but it is not. The user interface is simple to use, and it will immediately indicate the best choice for restoring your destroyed data.
4. Using the Up and Down arrow keys, scroll through the list and choose the disk from which you wish to recover your lost data. Once the disk has been highlighted, use the Right arrow key to highlight the Proceed option, then press Enter to pick the disk.
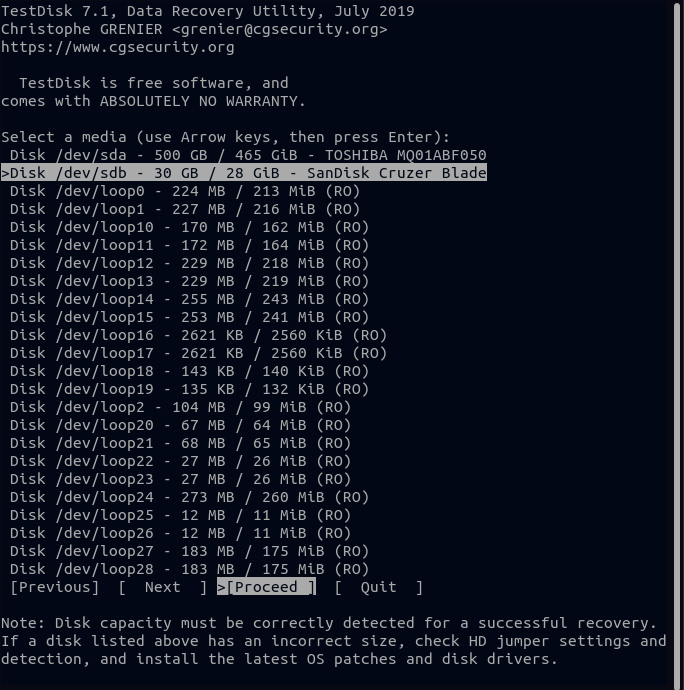 Choosing a Disk
5. Press Enter after selecting the partition type for your drive. It might be difficult to determine the proper partition table type, but don’t worry; TestDisk will automatically forecast and identify the correct partition.
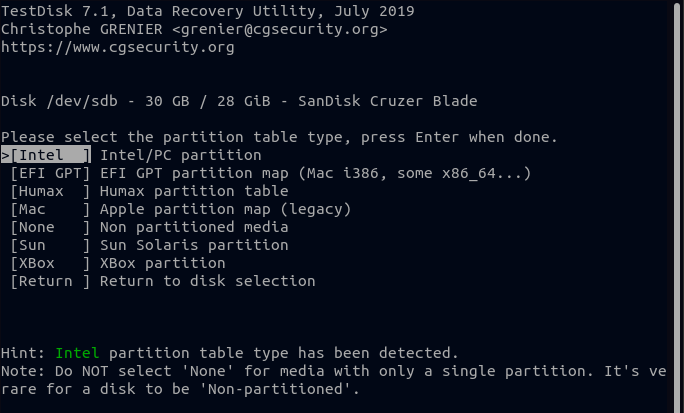 Choosing a Disk Partition
6. Select the Option 2: Advanced on the following screen since you’re recovering a deleted file, and then hit Enter.
Not only is TestDisk used to recover data, but it may also be used to repair faulty disks.
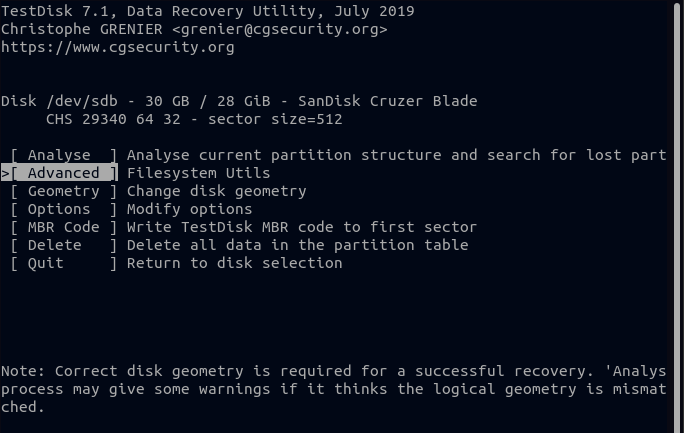 Option 2: Advanced
7. Select the Undelete option and hit Enter after selecting your disk’s partition with the Right arrow key. This guide will show you how to recover data from an external storage device having a FAT32 partition, such as a USB drive.
TestDisk now examines files associated with your partition and displays a list of deleted items in the following phase.
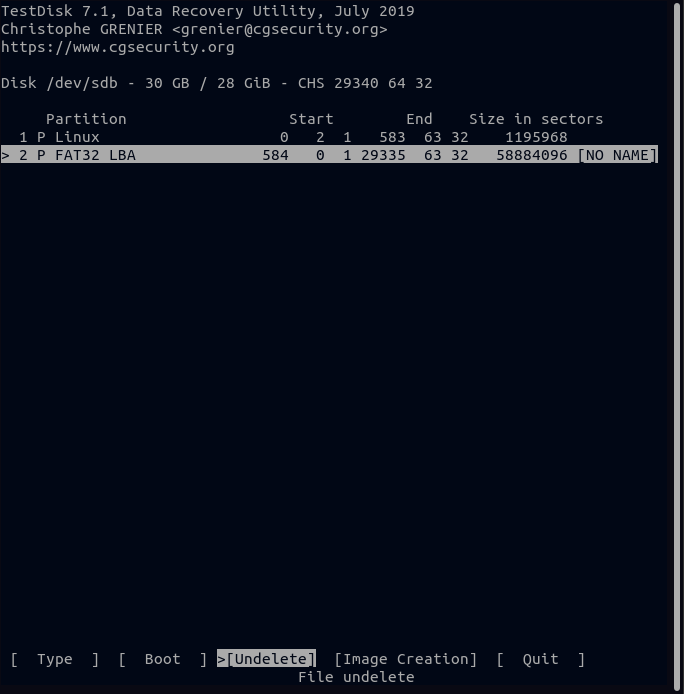 Scan for Deleted Files on a Specific Disk
8. Now, as indicated in the figure below, pick the file you wish to restore from the list of files.
If you need to pick several files, go to each one and hit the colon (:) key to choose the one you want to restore. After you’ve picked all of the files you want to restore, click C to transfer them to memory.
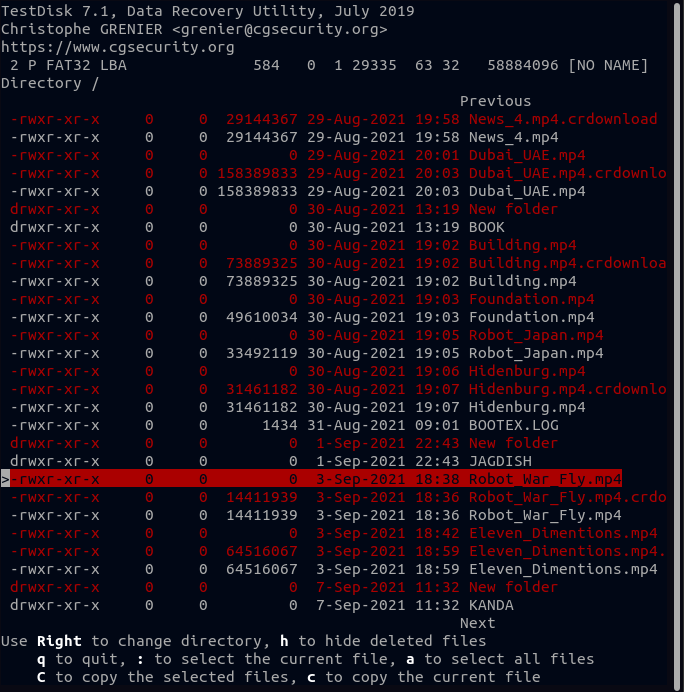 To restore a deleted file, choose Delete File.
9. Type in the location where you want the recovered file to be saved and click Enter.
Because navigating directory directories in TestDisk might be difficult, it’s typically recommended to save files to the same path from where you ran the tool. After saving, use a GUI file manager to copy/paste the files to your preferred place.
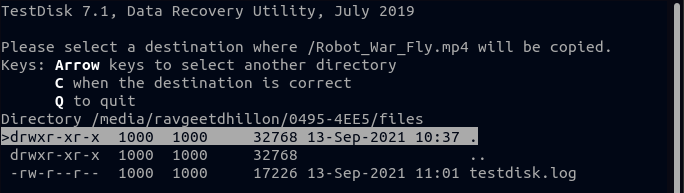 Save the restored file to this location.
As you can see in the screenshot below, TestDisk was able to recover the lost file (green text).
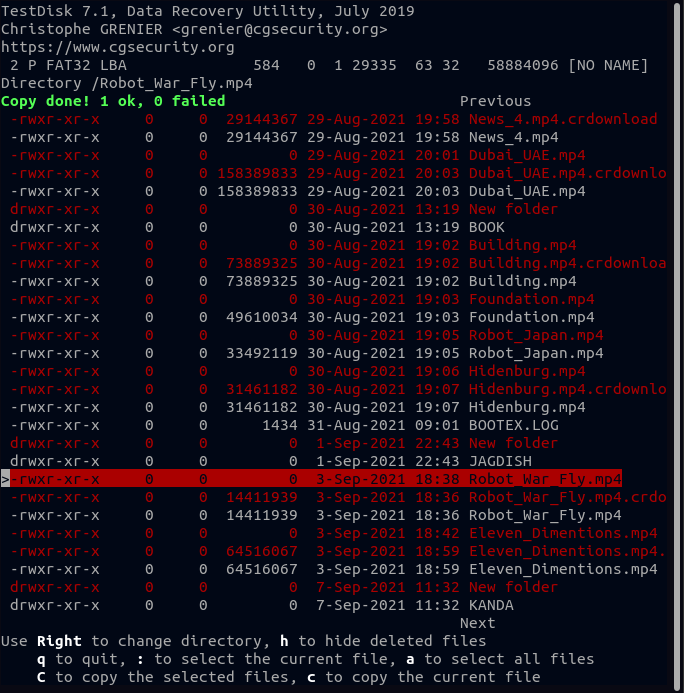 The File Has Been Successfully Recovered
Finally, open the location where you copied the file and double-check that your deleted file has been properly recovered.
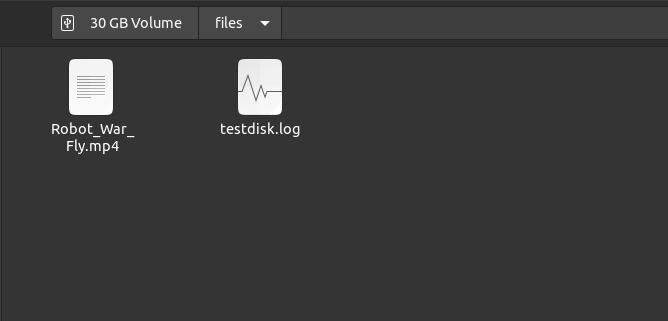 Using the File Manager to View a Recovered File
Conclusion
You learnt how to recover data from the Trash using File Manager and even permanently destroyed items with TestDisk in this article. Although the built-in File Manager and TestDisk are excellent at recovering data, you may also use third-party file recovery software.
Would you now use Linux’s TestDisk to recover erased files? Or maybe you’d rather have your Ubuntu system backed up automatically?
How to Back Up (and Restore) Your Ubuntu Computer is a related article.
The “linux recover deleted files from usb drive” is a tutorial that will teach you how to use Linux to recover deleted files. The process is very simple and straightforward, but there are some steps that need to be taken in order for the recovery to work properly.
Related Tags
- how to recover deleted folder in linux using rm -rf
- how to find which files and folders were deleted recently in linux
- how to recover deleted files in terminal
- how to check deleted files in linux
- recover deleted files ubuntu terminal
