This guide is part of our “How To Upload” series and explains how to use the program Powerpost to upload files. Please note that there’re several versions of this program which, while differing slightly, basically work the same, so this guide should work for all of them. Also remember our disclaimer.
First go to https://powerpost.free.fr/ to download Powerpost, the tool we’ll use to create the repair files and finally, upload everything to the newsserver. After extracting the archive, go to the directory and doubleclick YencPowerPostA&A11b.exe to fire up the program.
Setting Up Powerpost
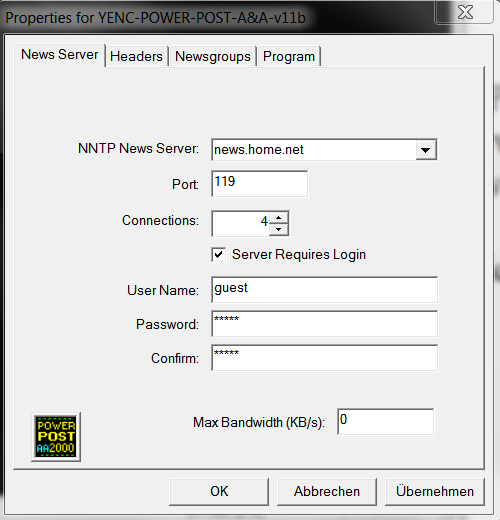
To begin with we need to fill in some settings. Click on “view” and select “program settings”.Enter your newsserver data:
 (Click to enlarge)
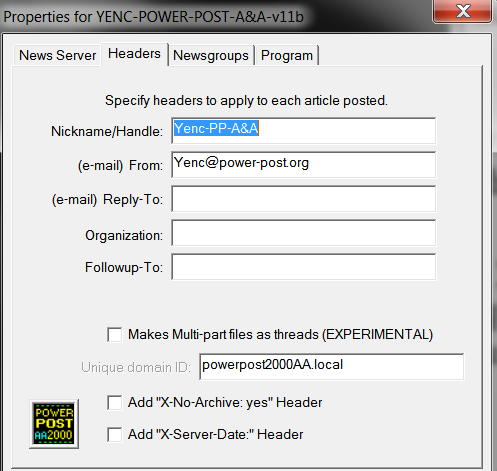
Then you may proceed to the “Headers” tab. We suggest just leaving everything as it is, but optionally you can put in a nickname or email address.
 (Click to enlarge)
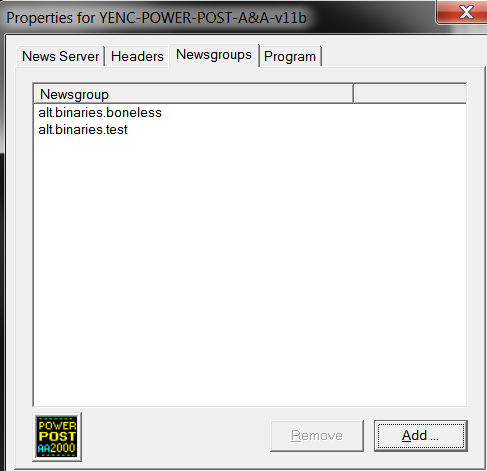
“Newsgroups” is quite an important section. Here you add the newsgroups your file should be posted in; we suggest picking one that is used frequently and fits your subject. There are tens of thousands of newsgroups, but the list of actually used ones is quite handy. Here’s a good list: https://www.ozinsight.com/populargroups.html
Click “add” and type in the newsgroups you want to use, one at the time.
 (Click to enlarge)
Last is “program”; we recommend these settings:
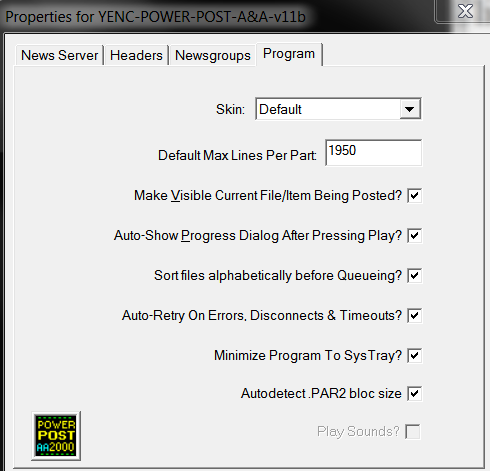 (Click to enlarge)
Note: When using a VPN to hide your identity it is highly recommended to uncheck the “Auto-Retry On Errors, Disconnects & Timeouts” to protect yourself against involuntarily continue uploading when your VPN disconnect occurs. This means you have to manually track and restart the process when necessary, but at least you’ll remain protected.
Hit OK to save the settings.
Create Recovery Files And Get Ready To Upload
Select “File” and “Add Files To Queue”. Select all files you want to upload (in our example all split archives and the nfo file) and click “open”.
Pro tip: You can select multiple files at a time by pressing the “CTRL” key on your keyboard while clicking on the files. Alternatively press “CTRL” and “A” at the same time to select all files, and then deselect the ones not needed by pressing “CTRL” and clicking on them.
A new window opens. In the “Subject” tab enter the name of your file and add some basic information to it, such as the language and format of the file (for example when uploading a Divx or Xvid add this).
Attention: Don’t delete the seemingly strange symbols and “yEnc” as to be seen in the following screenshot, since they translate into important information for newsreaders and Usenet search engines:
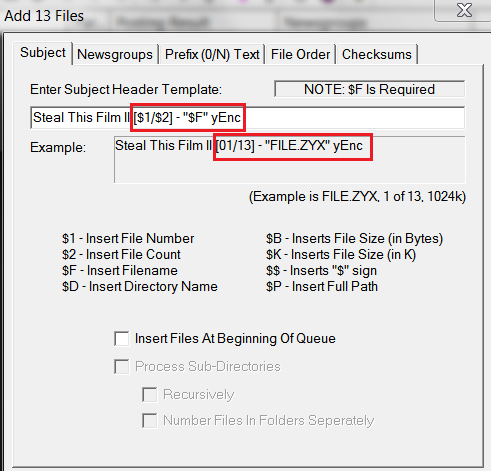 (Click to enlarge)
Next is the “newsgroup” tab where you should select only one group for your files.
Skip the two other tabs and go for the last one, “checksums”, where you tell Powerpost to create the important “PAR” files. Here check the first three boxes and optionally the fourth one too, as can be seen in this screenshot:
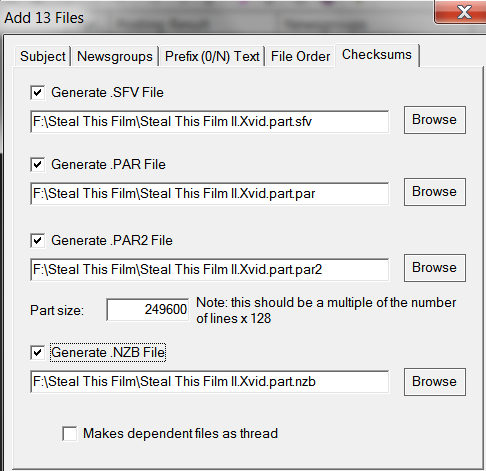 (Click to enlarge)
After this, click OK. After up to a few minutes of work a new window will open, which looks like this:
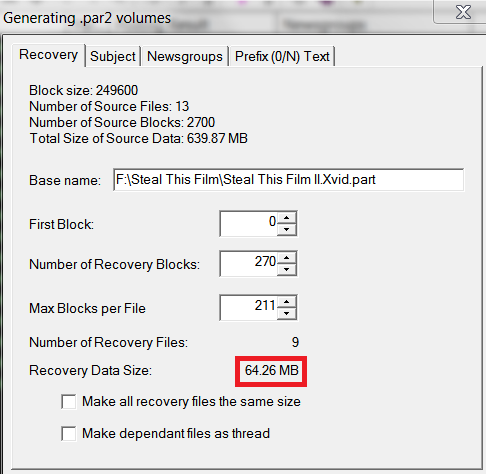 (Click to enlarge)
Highlighted is the size of the recovery blocks, with about 10% the size of the actual file size. This can be considered a good value for most uploads but you’re free to reduce or increase it. Click OK.
Begin Uploading
Warning: If you decided to upload anonymously be sure to fire up your VPN before going through the next steps!
Click on the little blue arrow to start the creation of the par files (and, if needed, give your computer a few moments. If it’s an older model it may be a good idea to wait until the process is done to proceed), then the yellow one…
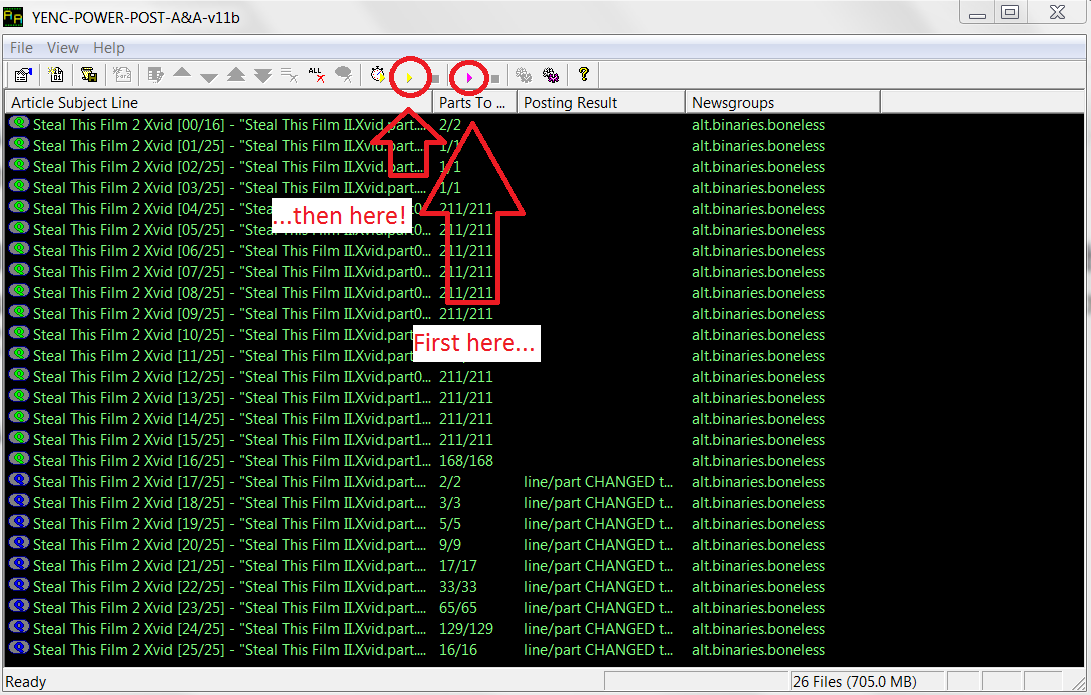 (Click to enlarge)
… and watch your first contribution to the Usenet community being uploaded.
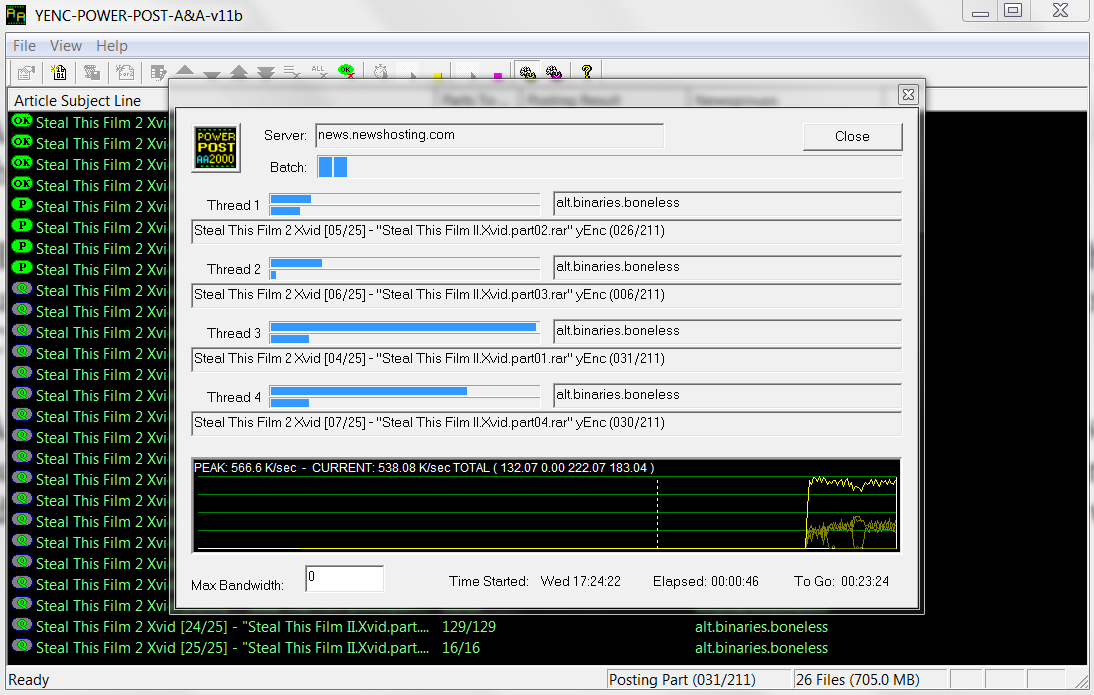 (Click to enlarge)
And there it is! You can pause and restart the upload by clicking on the square (it’s yellow now) to the right of the (now gray) “play” button you clicked to stop/pause the upload, although it is adviced not to do this too often as it might produce problems such as screwed up uploads.
Your files are now being uploaded to the Usenet and will surely soon be available on all major search engines. Great woooooooohoooooo!!!
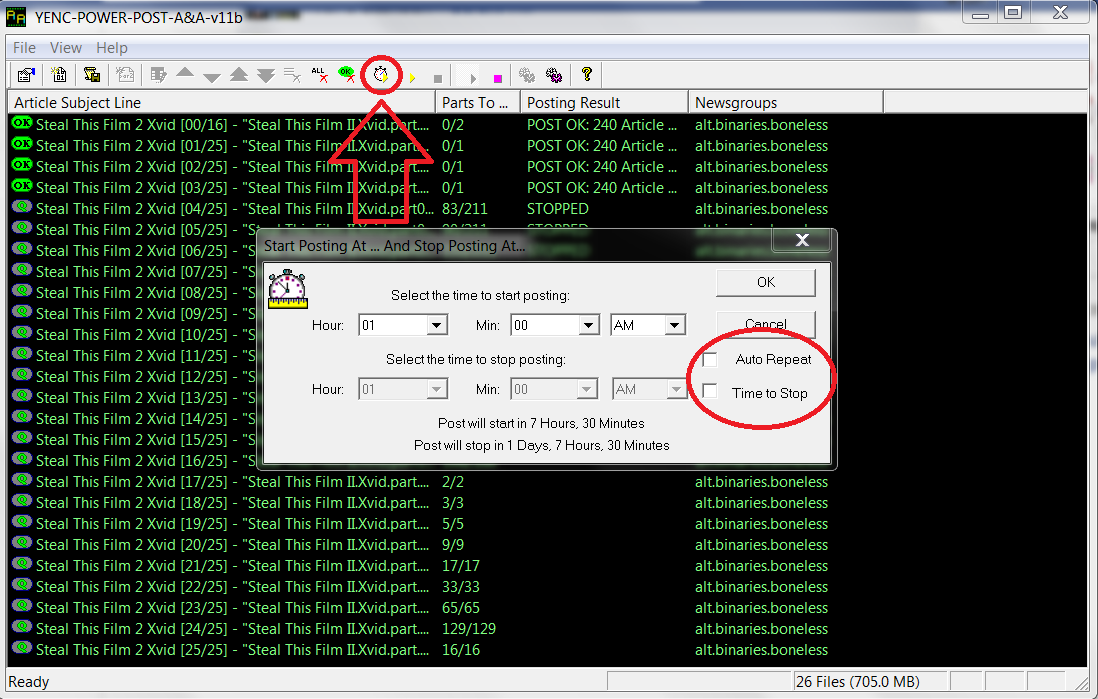
Additional pro tip: If you want to schedule your uploads to run only during a certain period of time, you can use the scheduler feature. For “power uploaders” it might be a good idea to click “Auto Repeat” as this will allow you to run through a long queue of uploads for several days automatically if needed.