Disclaimer: We’re not responsible for what you upload. Don’t do anything illegal. Use common sense. We don’t advocate nor encourage you to break laws, even not stupid ones that were merely bought by the copyright industry while severely undermining democracy and…. but I digress. The point is: You’re responsible for what you do, not us, so don’t abuse this guide to upload stuff you’re not allowed to, right? 😉
Since the Usenet lives from content users upload, we can only congratulate you to your decision to constribute! We’re here to guide you through the process, including security measures to maintain your privacy. It might seem to be a little long, but when you’re finished we assure you you will be (almost) an expert.
Step 0: How Uploads Should Look Like
Ever seen what the files you download look like? If you use modern newsreaders chances are you have only seen the finished video file, game or whatever it was after being loaded and processed by your Usenet downloader, so you don’t see much of the multiple archive parts files are splitted into when being uploaded.
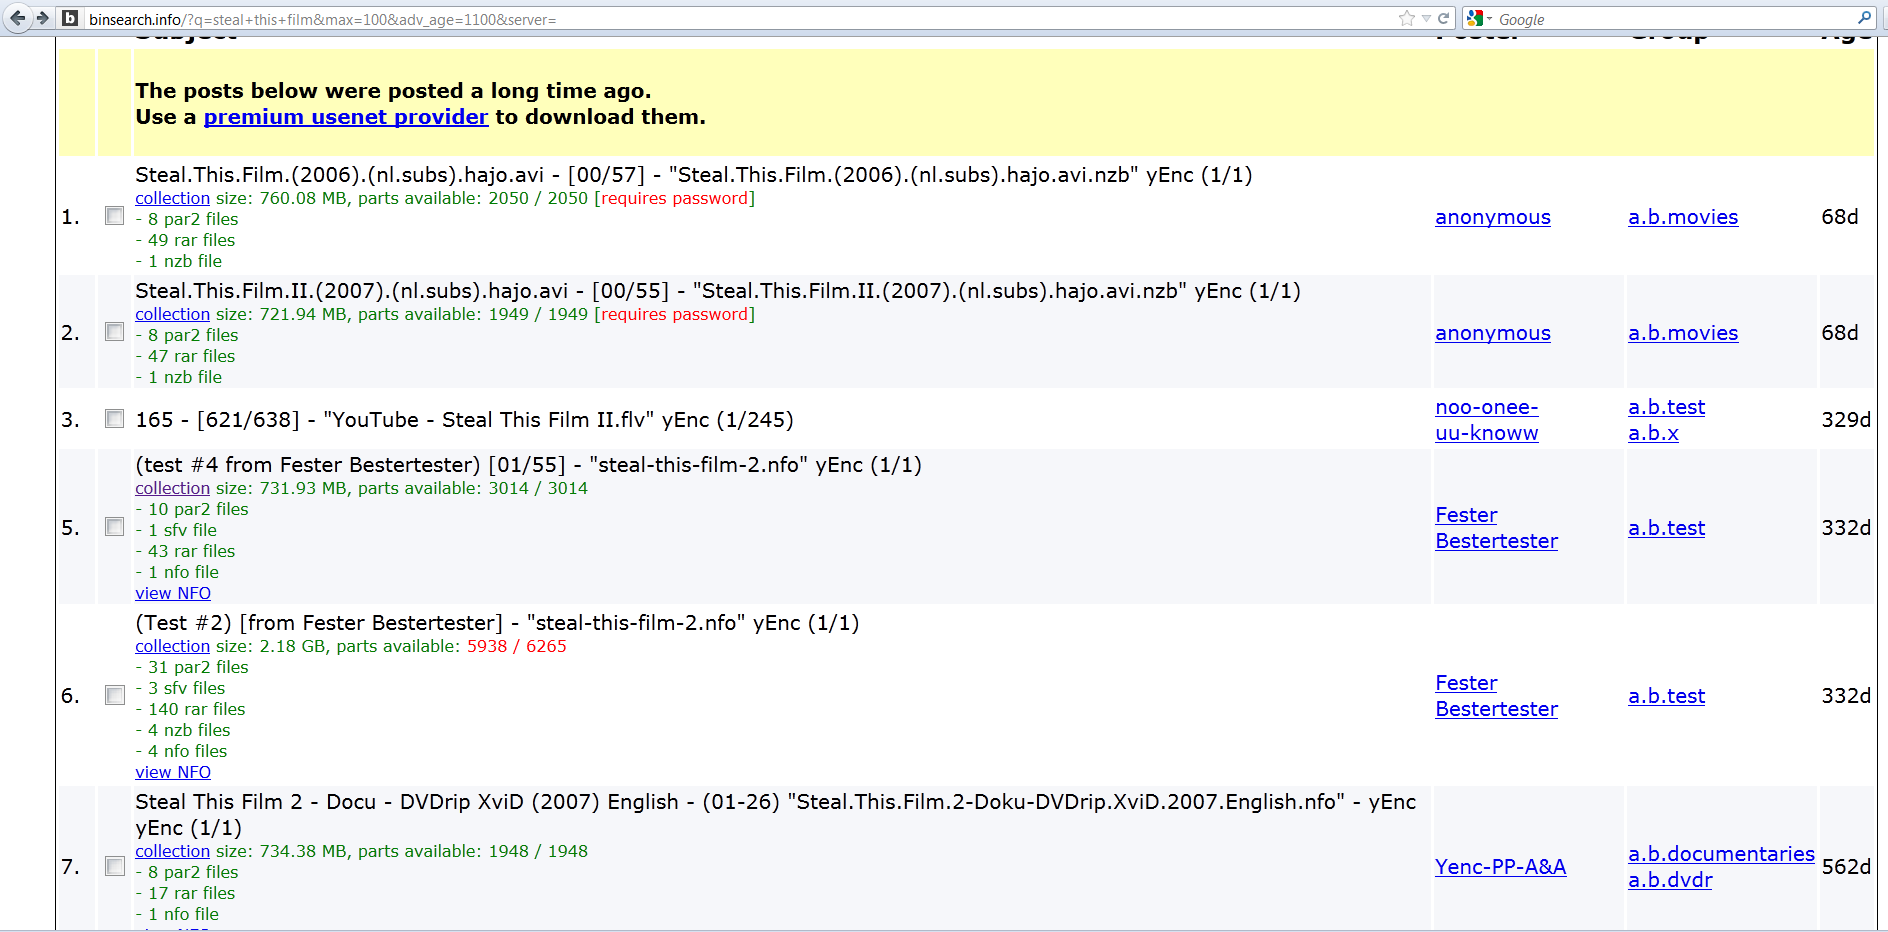
Take for example this search result for the popular movie “Steal This Film”. See the little link saying “collection”? Let’s have a look…
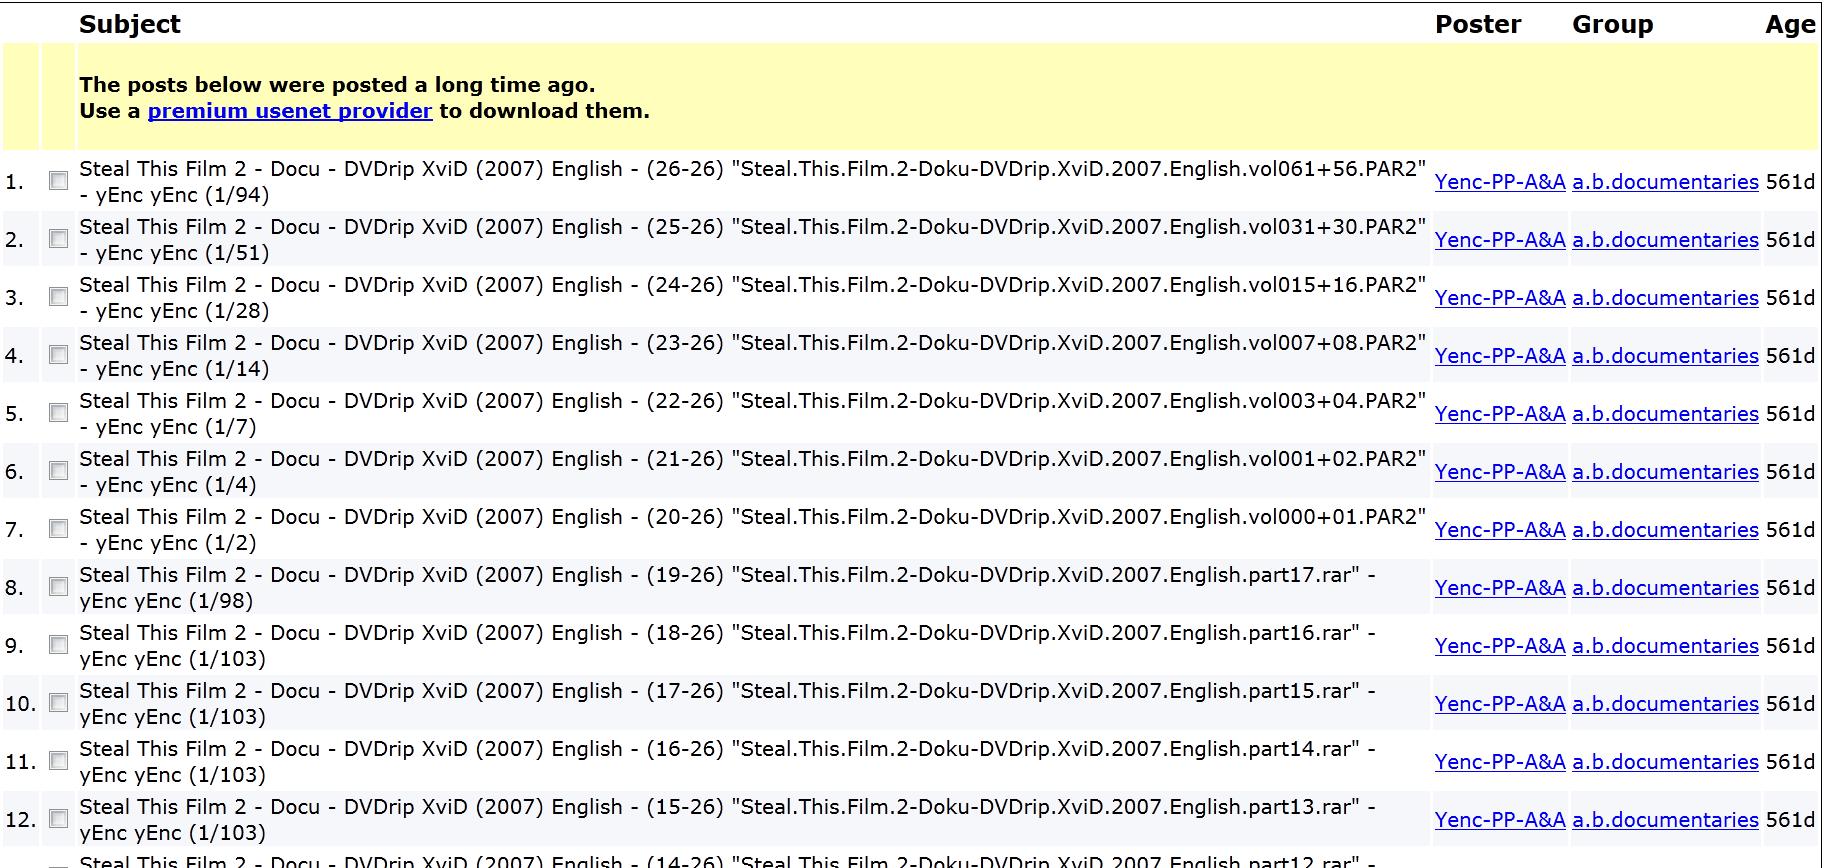
Whoaaah, what’s all this, you ask? Things look complicated like hell, but in fact, it’s quite simple:
- The first type of file that you see are split archives, usually the “RAR” format. Ever used ZIP or RAR files? This is the same thing, except that the packing programm has been set to split files in several smaller files, therefore the many little files that say “partxyz.rar” are all part of a single, large container for your download.Don’t ask why it is done that way, as this is mostly due to historical reasons. Most likely newsservers didn’t accept large files being posted to them; if it’s possible nowadays to upload the whole thing in one piece I don’t know, but since it is not a big hassle to do it like this, who cares? (However if you do be sure to check out our technical articles at)
- Also very common are “PAR” files which serve as “repair” files in case something went wrong while your newsserver received the file from its peers (to read more about this, read) or while you downloaded it. Usually 5%-10% the size of the actual files, it enables users to fix these errors; nowadays your newsreader should do this on himself too.It’s VITAL to stress how important it is not to skip these. Beginners tend to upload smaller files such as mp3s without including any PAR files, often to save time while posting; by all means, don’t do that! Unless you’re using Giganews chances are almost everything you download will have to be repaired at some point, the larger the file the more likely being. Ever wanted something badly, maybe a rare file, and when you finally got it you found it to be broken being repair? Yes? Well then, let’s try to reduce the risk of frustration for you fellow Useneters to a minimum; small errors are very common but usually get repaired automatically, provided you created enough recovery files.
- To finish, there usually is an NFO and a SFV file. While you can just forget about the later, NFOs are like little text files containing information about posts. Not necessarily needed, but a nice thing to have. If you decide to add one, check out our nfo creation guide here:
Step 0.5: Security – Avoid Being Tracked Down
So is it possible to track down what you uploaded? It depends on your Usenet provider; some add a so called “X-Trace header line” to your posts, which either directly shows your IP or enables your provider to unmask you. Sometimes the information to do this is only kept for a limited time, sometimes not. Either way you should contact their support and just kindly ask how this is handled.
Don’t even THINK of uploading anything if they turn out to log your identity for longer that you feel comfortable with as it will only cause you headaches.
A note about SSL (encryption) when uploading: You can use it, but it won’t help with this issue. The only advantage it has is, as always with encryption, that people directly tracking your connection, read your ISP, sniffers when using WiFi or the network administrator of your school / university if you use their network etc. can’t read your traffic, and maybe escaping traffic throttling, nothing more. Also most uploading tools don’t support SSL.
If you need a way to be (almost) absolutely sure no one can track you down, we got you covered, even though it will cost a few bucks. The guide we compiled can be found here: How To Upload Anonymously
Note: When uploading music / audiobooks you can skip this step, provided that no file is larger than 100 MB (preferably 50 MB as some servers will reject anything bigger than that, and you want to make your posting available for most Useneters I presume). It makes it easier for downloaders to find specific songs without knowing in which album it is and only get the file they’re interested in.
After we covered basics and security we can begin with the actual process of preparing your files for upload, in our example the movie “Steal This Film”. For this step you need WinRAR which you can download for free at www.winrar.com
Start WinRAR, go to the directory the file(s) is in and select it, then click on the “Add” button in the upper left corner.
Set “compression mode” to “store”; it will make the process faster and compression is quite useless for most files anyway since they’re already compressed. Under “split to volumes, size” select 50 MB (some prefer 15 MB parts for smaller files under 1 GB in size) and hit the OK button.
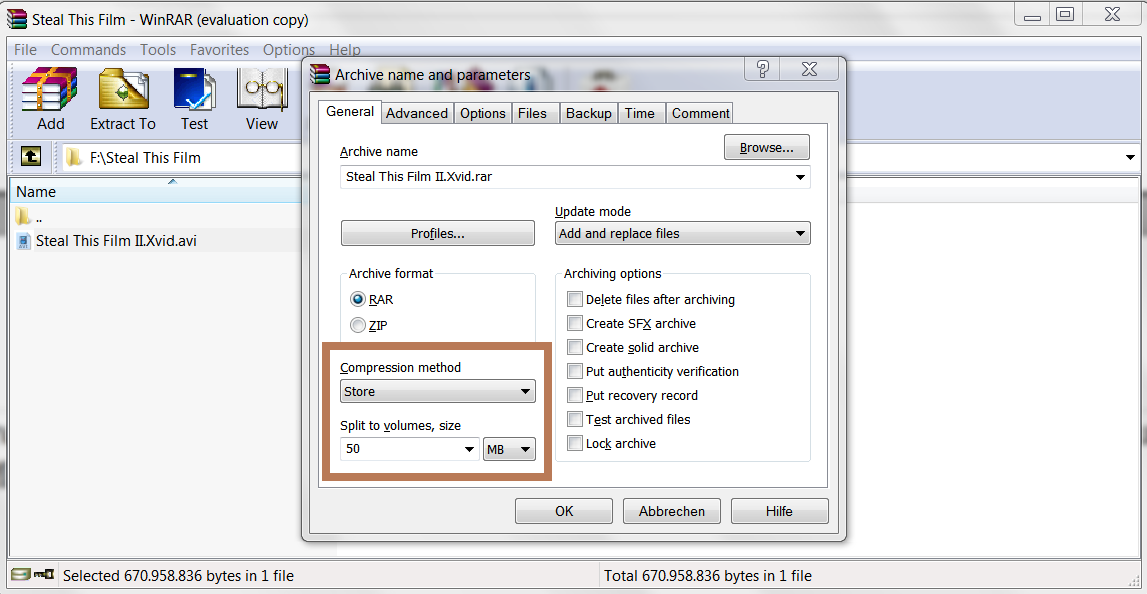 (A screenshot of how the settings should look like. Click to enlarge)
After a few seconds, the result will look like this:
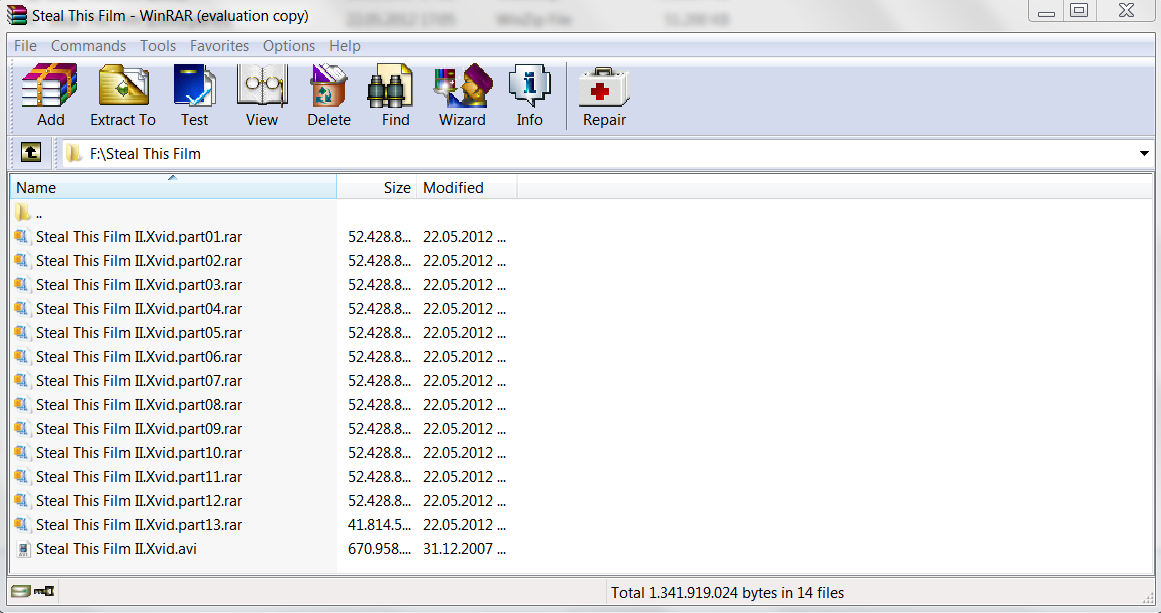 (Click to enlarge)
[line]
Step 2: Create Recovery Files Using QuickPAR
Whether or not you need to do this manually depends on the uploading program you’re using. If you’re planning to use yEnc Powerpost (which doesn’t support SSL) it isn’t necessary as they will be created automatically, and you can just skip this step; however when using JBinUp or Easy Usenet Uploader (which both support SSL), follow these steps. If you’re unsure, just go through it, it won’t hurt.
Head over to Quickpar.com and download the program. Fire it up, click on “Add Files” and select all part archives (never include the original, unprocessed file(s), only what you’ll actually upload!) you created in the step above.
Now you should get something like this:
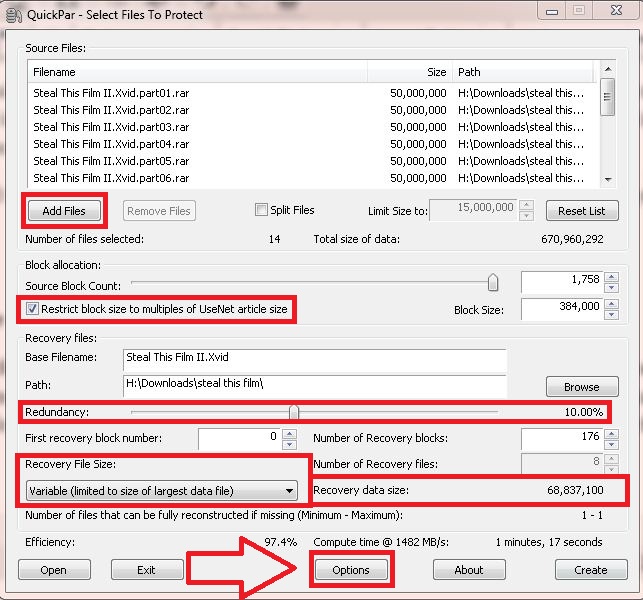 (Click to enlarge)
There should be no need to change the settings. We marked some of the important options on the screenshot, and here are some more details about these in case you’re curious:
[accordion id=”my-accordion”] [accordion_item parent_id=”my-accordion” title=”Restrict block size to multiples of UseNet article size” open=”false”] – “Restrict block size to multiples of UseNet article size” should always be activated: It makes sure the size of the recovery files won’t become too big; this avoids problems with servers rejecting the upload. [/accordion_item] [accordion_item parent_id=”my-accordion” title=””Redundancy””]The higher this is set, the more repair blocks will be created which makes the uploading process longer; however, more repair blocks means a higher chance for people missing pieces of your upload to repair it.
A common redundancy is 10%, which increases the amount of data to be uploaded by about 10%, as you can see in the screenshot. If you feel like it you can increase the percentage, just never decrease it to less than 5%. Remember: More repair blocks means less potential frustration for your fellow Useneters![/accordion_item] [/accordion]
Now click on “Options“. Is “Preferred Block size” set to “For yEnc: 3000 lines”? Good! Click on and hit the “Create” button on the lower right corner of the main window. After a few minutes of work, you’ve successfully completed this step.
Step 3 (optional): Create An NFO File
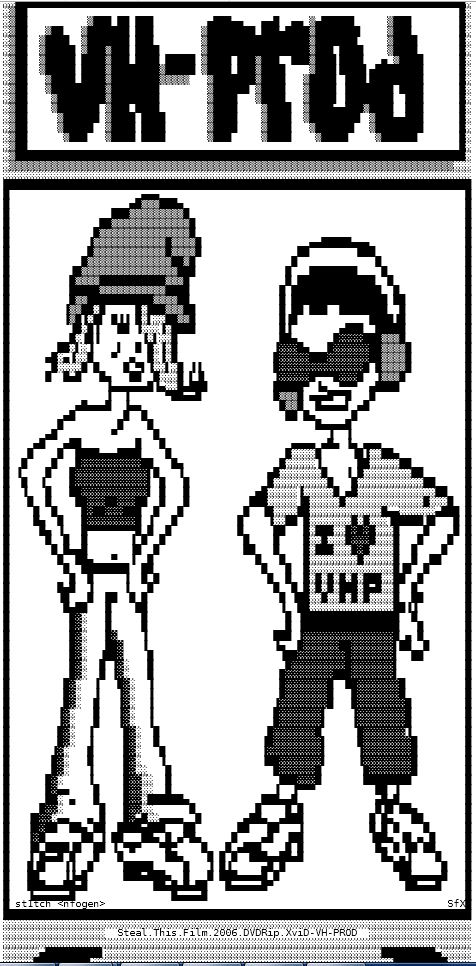
An NFO file (for “information”) is a little document that contains more or less detailed information about an upload or release. Big warez groups traditionally use them and include guides on how to install the game or program released, the quality, format and subtitles included in case of movies, format and a tracklist for albums etc., and often add beautiful images such as this one:
 (A snipped of the nfo, click here for the original or click on the image to enlarge)
While you don’t need to create artwork for your uploads or decorate them, it might be a good idea to attach one to your upload and include some of the information mentioned above. It might prove very helpful for your fellow Useneters.
So how do you create an NFO file and what should you include? This depends on the kind of data you’re uploading; when reposting a scene release (read: a file you downloaded elsewhere that was released by a big warez group) just use the one made by them. Head over to Xrel.to or a similar NFO archive (several can be found doing a simple Google search) and download a copy.
Or, if you’re releasing something you made yourself or can’t find an NFO, write one yourself.
To make things easier for you we compiled a guide for that too: Click here for our NFO guide.
Step 4: Which Uploading Program To Use?
For the actual uploading process you need an uploading program. The question becomes, which one should you use?
We personally love yEnc Powerpost, one of the oldest and best-known uploaders. Countless versions have been released over the years. It doesn’t have multi-server or SSL support but creates PAR-files automatically; a scheduler allows you to only upload during specific time periods if you which so.
For beginners the interface might prove a little confusing, but of course we’ve prepared a step-by-step tutorial for you.
We highly recommend this one if you choose to upload anonymously using a VPN as it is the only tool you can prevent from continuing posting unprotected in case the connection to the VPN breaks off! SSL if useless when you’re connected to an anonymization service anyway…
