The goal of this post is to help you get started with Veeam and VMware vSphere. There are a few requirements, but if you follow the steps below it will be easy to start backing up your production environment in minutes.
Veeam Backup & Replication is a powerful backup and replication solution for virtualized environments. It leverages the capabilities of VMware vSphere to provide a complete, end-to-end data protection solution.
If you need peace of mind that your virtual machines (VMs) are backed up and safe in case of a disaster, and it’s time to look at Veeam Backup & Replication. Veeam’s VM backup product is handy for backup and recovery of both Windows and Linux VMs securely.
In this tutorial, you’ll learn how to get started with Veeam Backup & Replication by walking through the initial setup and backing up and restoring a VM.
Let’s get this party started!
Prerequisites
Hands-on demos will be included in this essay. Make sure you have the following items in order to follow along:
- A machine running Windows 10. The operating system used in this lesson is Windows 10 20H2.
- At least one VM to back up on a VMware vSphere hypervisor. Although Veeam can backup Hyper-V VMs as well, this article will concentrate on VMware.
- On the instance to back up, a vSphere user account with suitable permissions.
- The Veeam Backup & Replication ISO on your PC – This tutorial will be using v11.0 (Community Edition).
How to Set Up the VMware vSphere Client is a related topic (Installable and Web)
Veeam Installation and Configuration
Let’s first install Veeam Backup & Replication on your PC. Without further ado, let’s get to installing!
1. Run the setup.exe program from the Veeam ISO on your local computer.
 Installation of the Veeam ISO
2. To install Veeam, choose Install, then install all independent components listed below.
 Getting Veeam up and running
3. Because you’re utilizing the Community Edition in this tutorial, click Next to forgo supplying a license.
 Giving Us Your Veeam License File
4. Click Next after leaving the default install location for Veeam as indicated below. If you’d want to install Veeam somewhere else, use the Browse option to find a suitable place.
 Choosing an Installation Site
5. If any prerequisites are missing, click Install, as indicated below. Click Next after all of the prerequisites have been installed.
 Veaam Requirements Installation
6. Review the installation settings summary and then click Install. After ticking the Let me specify various options box, you may make further changes by clicking next. But for the sake of this lesson, let’s remain with the settings.
 Leave the settings as they are, or modify them by checking the box below.
Creating a Job Backup
Now that you’ve installed Veeam Backup & Replication, let’s go through the steps on Creating a Job Backup. Veeam lets you replicate a fully hydrated and fully functioning copy of a source virtual machine (VM) at a remote location as a backup.
As an example, this article will backup Tiny Veeam using most of the default settings.
The installation wizard for Veeam detects the volume with the most free disk space during the installation process. The backup folder is then set as the default backup repository for storing backup files. Veeam will provide the location when you configure Veeam Backup and Replication.
1. Open Veeam Backup & Replication on your desktop.
2. To see a list of backed-up tasks, go to the left panel’s Home tab and pick Jobs, as shown below.
 Getting to the Job List
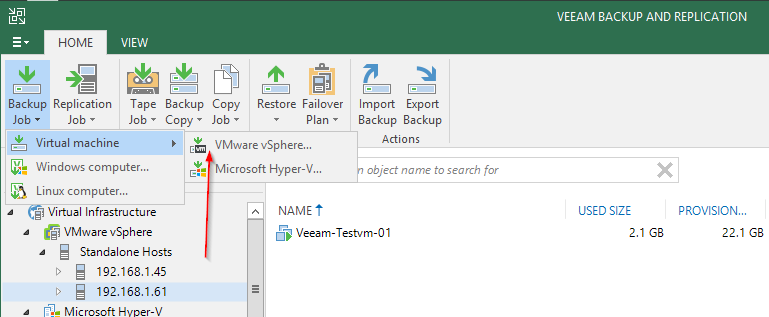
3. Next, click on Backup Job from the toolbar —> Virtual machine —> VMware vSphere. The New Backup Job configuration window will pop up in the next step where you’ll create a backup job for a virtual machine.
 Creating a Backup Job with VMware vSphere
4. In the New Backup Job box, on the Name tab, type your chosen backup job name and description, then choose a virtual machine to backup by clicking Next.
 Creating a unique name and description for your backup job
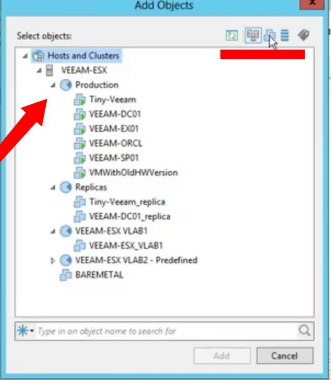
5. From the list below, choose a virtual machine to back up. Select Tiny Veeam under Production and click Add since you’re backing up Tiny Veeam for this instance.
Return to the New Backup Job window and click Next to configure storage.
 Backup with a Tiny Veeam Virtual Machine
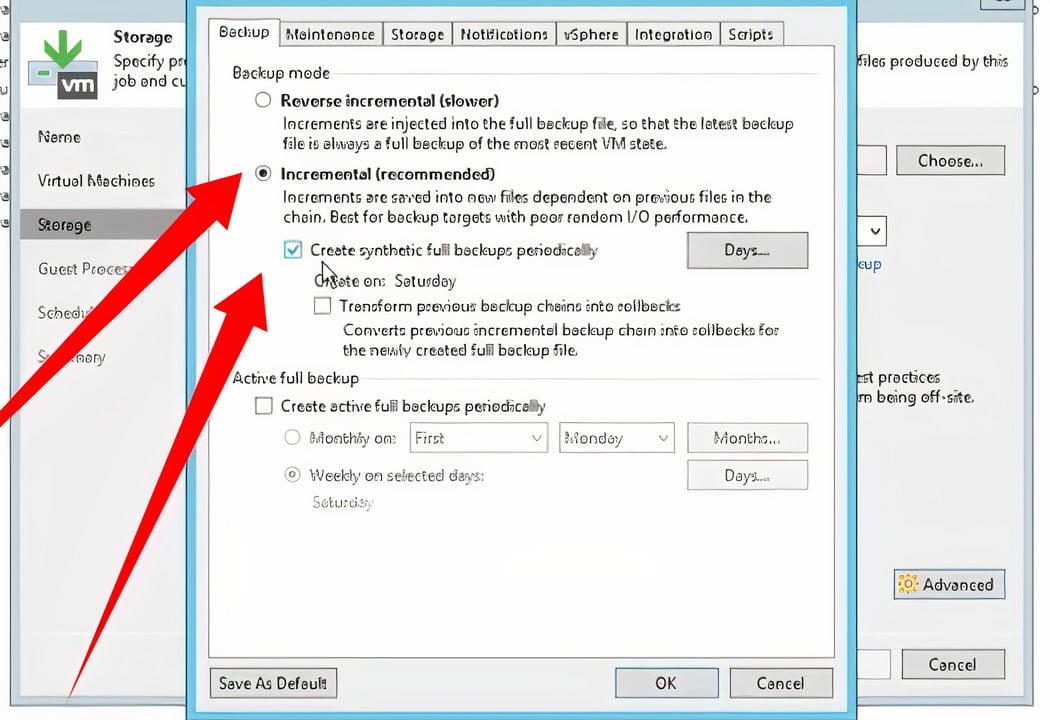
6. Leave the default settings alone since Veeam will configure the appropriate parameters for your backup job when you create it. To access advanced job options, click the Advanced button.
Under Backup mode, choose the Incremental (recommended) option. As a result, increments in new files based on the previously stored archive will be preserved.
To produce a synthetic full backup on a regular basis, enable the Create synthetic full backups regularly option, then click OK to save the settings. Instead of backing up data from a client computer, a synthetic full backup combines the data from the most recent full backup with subsequent incremental backups.
To set Guest Processing, return to the New Backup Job box and click Next.
 Under Backup mode, choose Increment to Enable Creating Synthetic Full Backup.
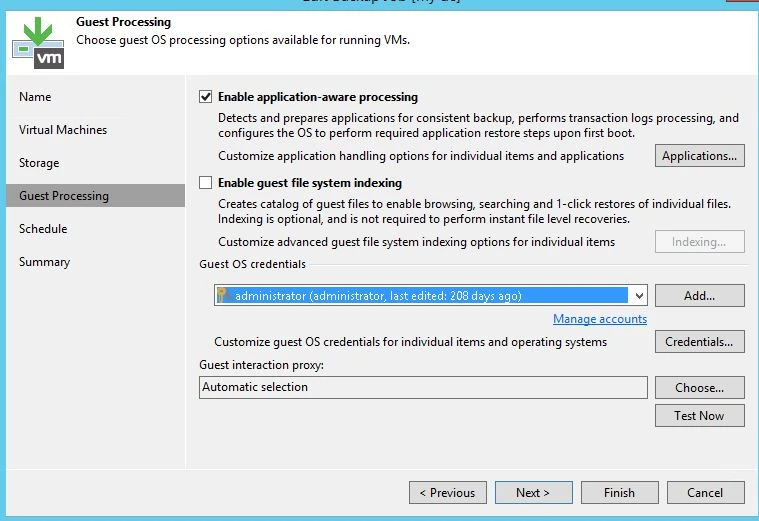
7. Check the Activate application-aware processing option under the Guest Processing section to enable the Application-Aware Processing functionality. Veeam’s approach for quiescing apps on virtual machines is called application-aware processing. On the VM guest OS, quiescing apps produce a consistent picture of application data.
To activate the Guest Processing options, select the Enable guest file system indexing option, then click Next to define the backup schedule. Guest Processing options are complex processes that need Veeam Backup and Replication communicating with the virtual machine’s guest operating system.
 Using the Guest File System
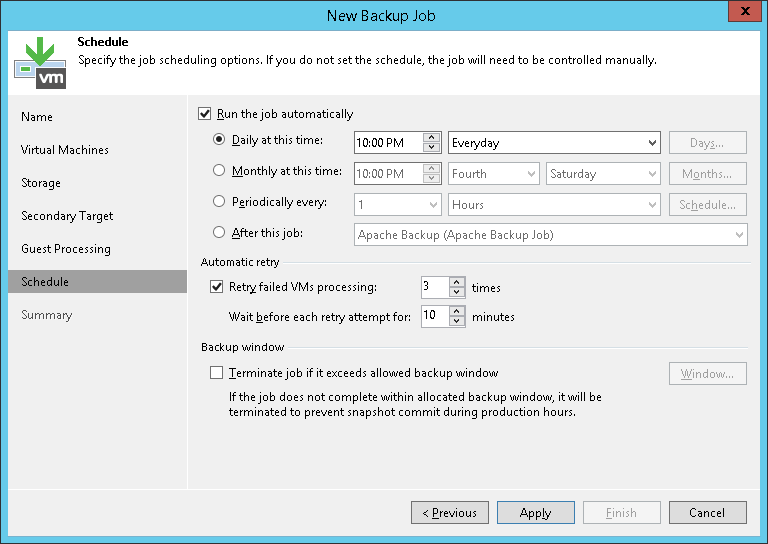
8. Make the backup job run automatically by using the following command:
- Enable the option to run the task automatically.
- Make any required changes to the frequency with which Veeam must conduct the backup operation. The frequency might be daily, monthly, on a regular basis, or when another backup operation is completed.
- To put the changes into effect, click Apply.
 Activating the Scheduled Backup Job
9. Review the setup summary at the end. To execute the backup job as soon as you click Finish, check the Run this job when I click Finish option.
If you need more assistance on which settings to choose when Creating a Job Backup, Veeam offers a technical support, or visit the Veeam R&D Forums
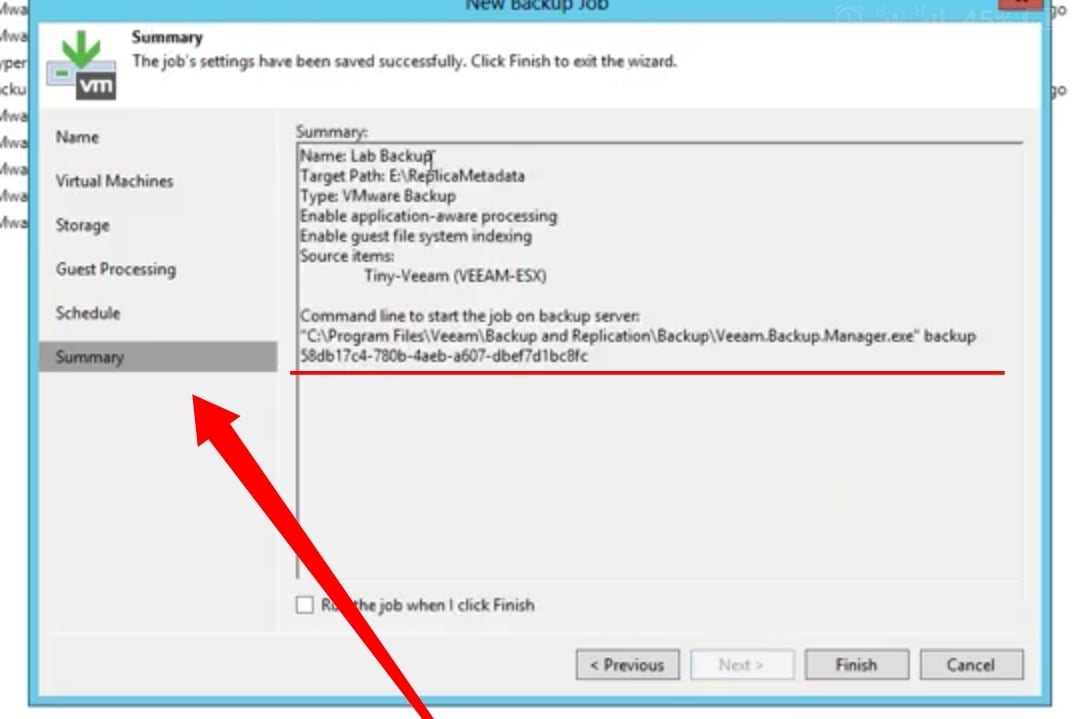 Before backing up, compare the summary to the default configuration or the settings you’ve altered.
To validate that the backup job is running, go to Veeam’s main window and click the Running item in the Last 24 Hours area on the left panel.
As you can see in the screenshot below, the Lab Backup item in the list table is now in process, with a 0% completion rate.
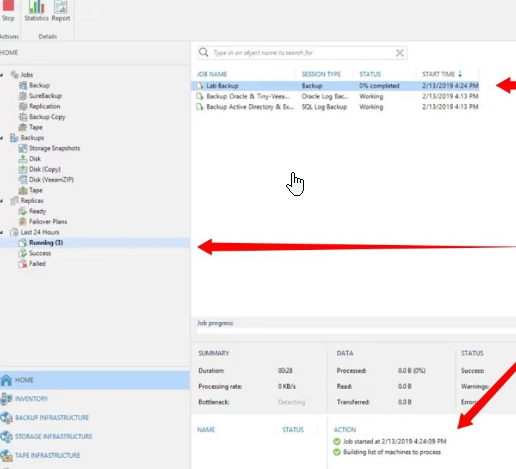 The backup job is now being viewed.
How to Use Veeam to Back Up an Amazon AWS VPC for Free
Restoring a Previously Saved Job
After you’ve completed Creating a Job Backup, you may be wondering how to restore from the backed-up job you created. Veeam doesn’t require staging and offers flexible recovery letting you restore from Veeam, HyperVeeam, and other Guest OS like Windows and Linux.
You may recover data from the VM copy at any point in the backed-up operation using a Virtual Private Network (VPN), Wide Area Network (WAN), or Multiprotocol Label Switching (MPLS) connection.
Let’s have a look at how the restoration is carried out.
1. Navigate to Veeam’s Home tab, then click on Restore in the ribbon toolbar —> VMware vSphere, as you see below to see the available restore options.
 Getting to Restore Options
2. When the Restore box appears, choose Restore from backup to retrieve the file you want from your backup repository.
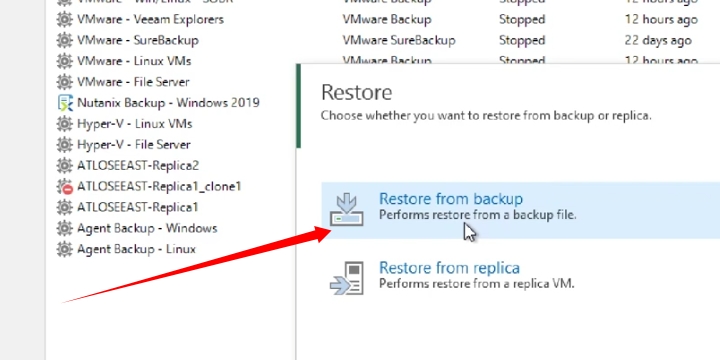 Selecting the option to Restore from a Backup
3. To begin a file-level recovery, choose the Guest file restore option.
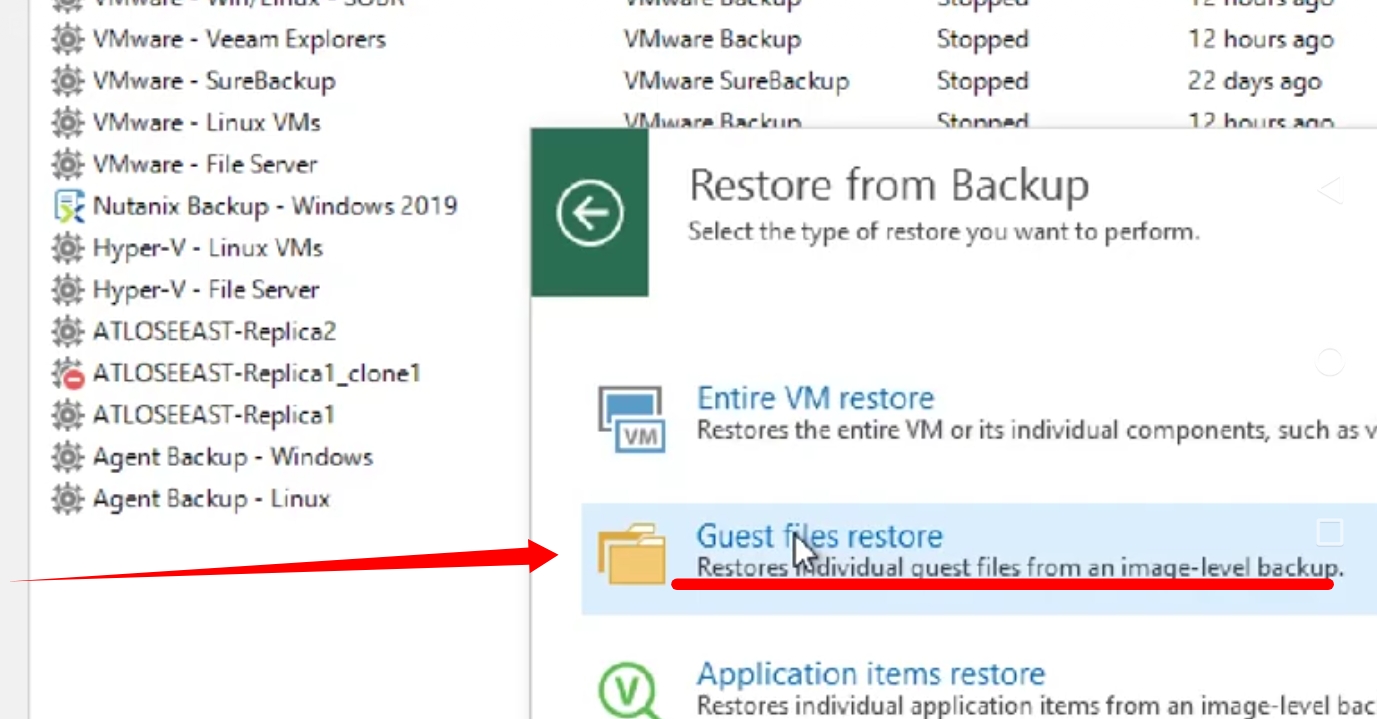 Selecting the Option to Restore Guest Files
4. Now, depending on your accessible computer, pick one of the alternatives below to recover a file from. However, in this case, Microsoft Windows is the best option.
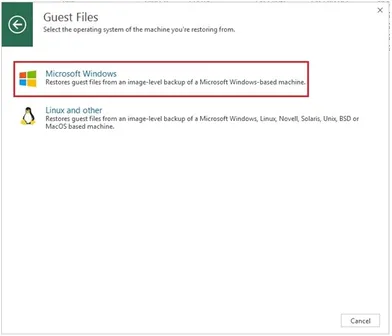 Selecting the Machine From Which You Will Restore
5. In the File Level Restore box, choose the restore point you wish to restore from the table list under the Restore Point section. To provide a rationale for restoring the backed-up task you chose, click Next.
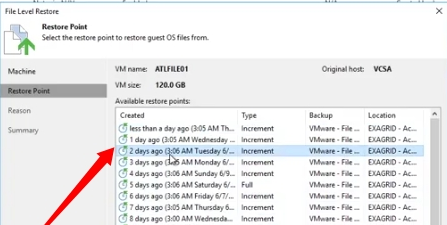 Choosing a Restoration Point
6. Determine why the repair is being carried out (optional). If you don’t want to see this page again, tick the box at the bottom that says Don’t show me this page again.
To get a summary of the file-level restoration options, click Next.
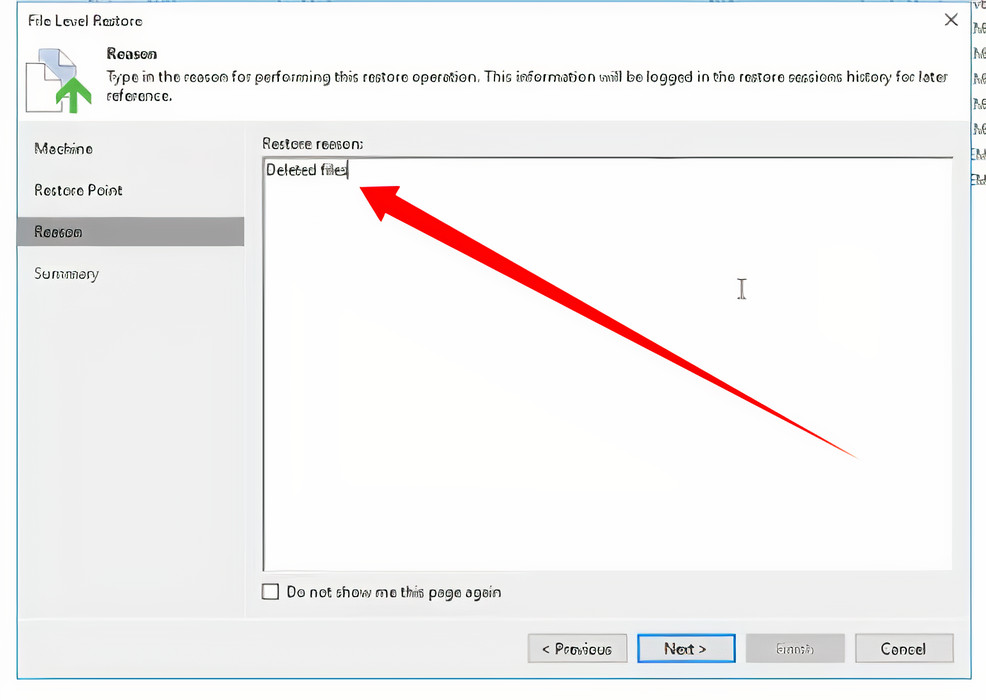 Defining the Purpose of the Restoration
7. Look through the restoration settings summary, which is displayed below. To begin the restoration procedure, click Finish.
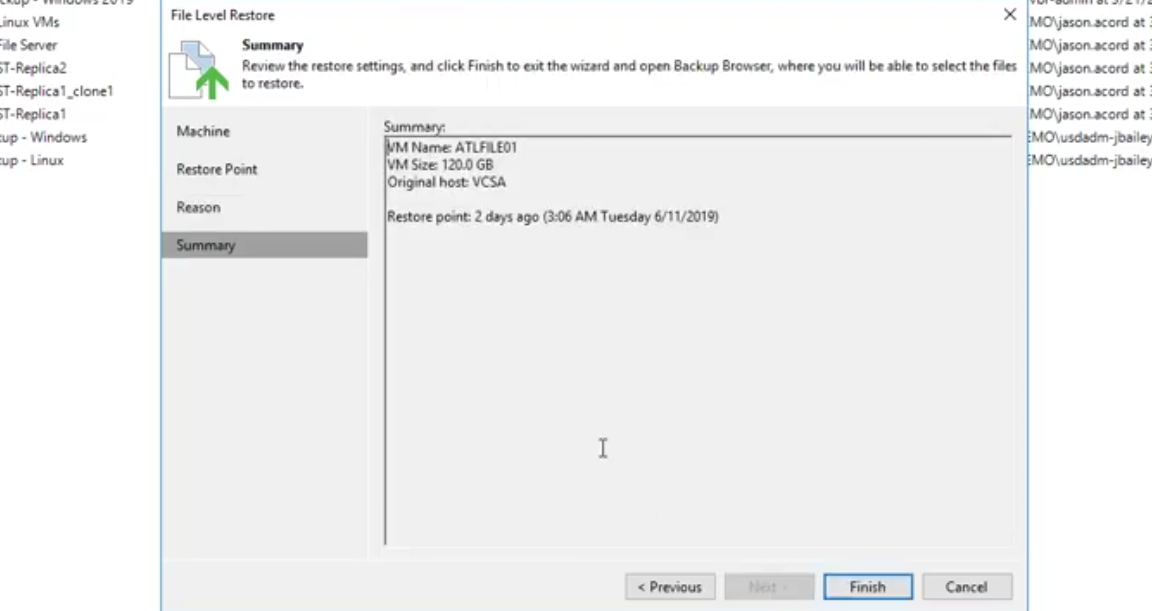 Taking a look at the summary and starting the recovery process
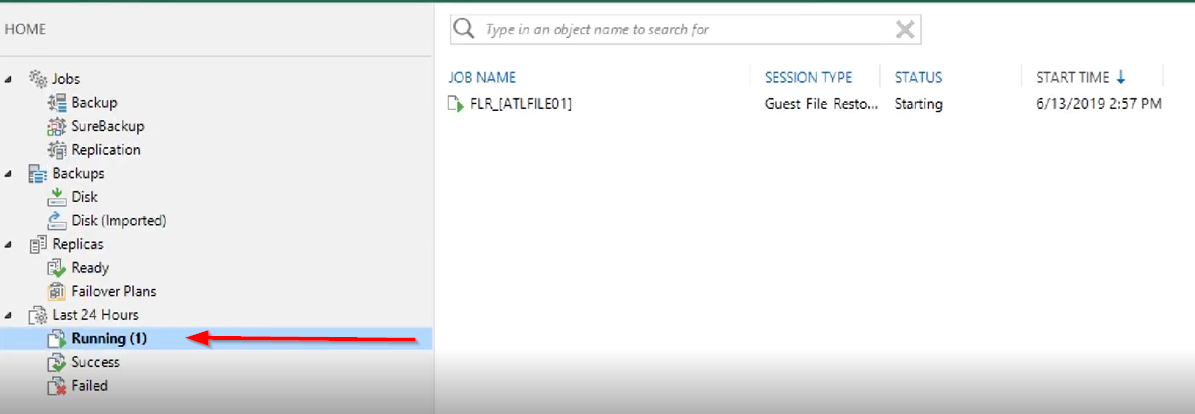
8. In Veeam’s main window, go to the Last 24 Hours area in the left panel and select the Running item to observe the VM instance restoration in progress.
 Observing the Restoration Work
9. Open the virtual machine you chose in the restore point table to save the exact file you wish to recover (step five).
Right-click the file you want to restore (en-US) and choose Restore from the context menu, as shown below. Choose whether to overwrite the existing file or to keep and restore it at the same time.
 Choosing whether or not to overwrite an existing file
Finally, start File Explorer and browse to the same place you specified for restoration to see whether the file has been restored.
The folder en-US has been successfully restored, as seen below.
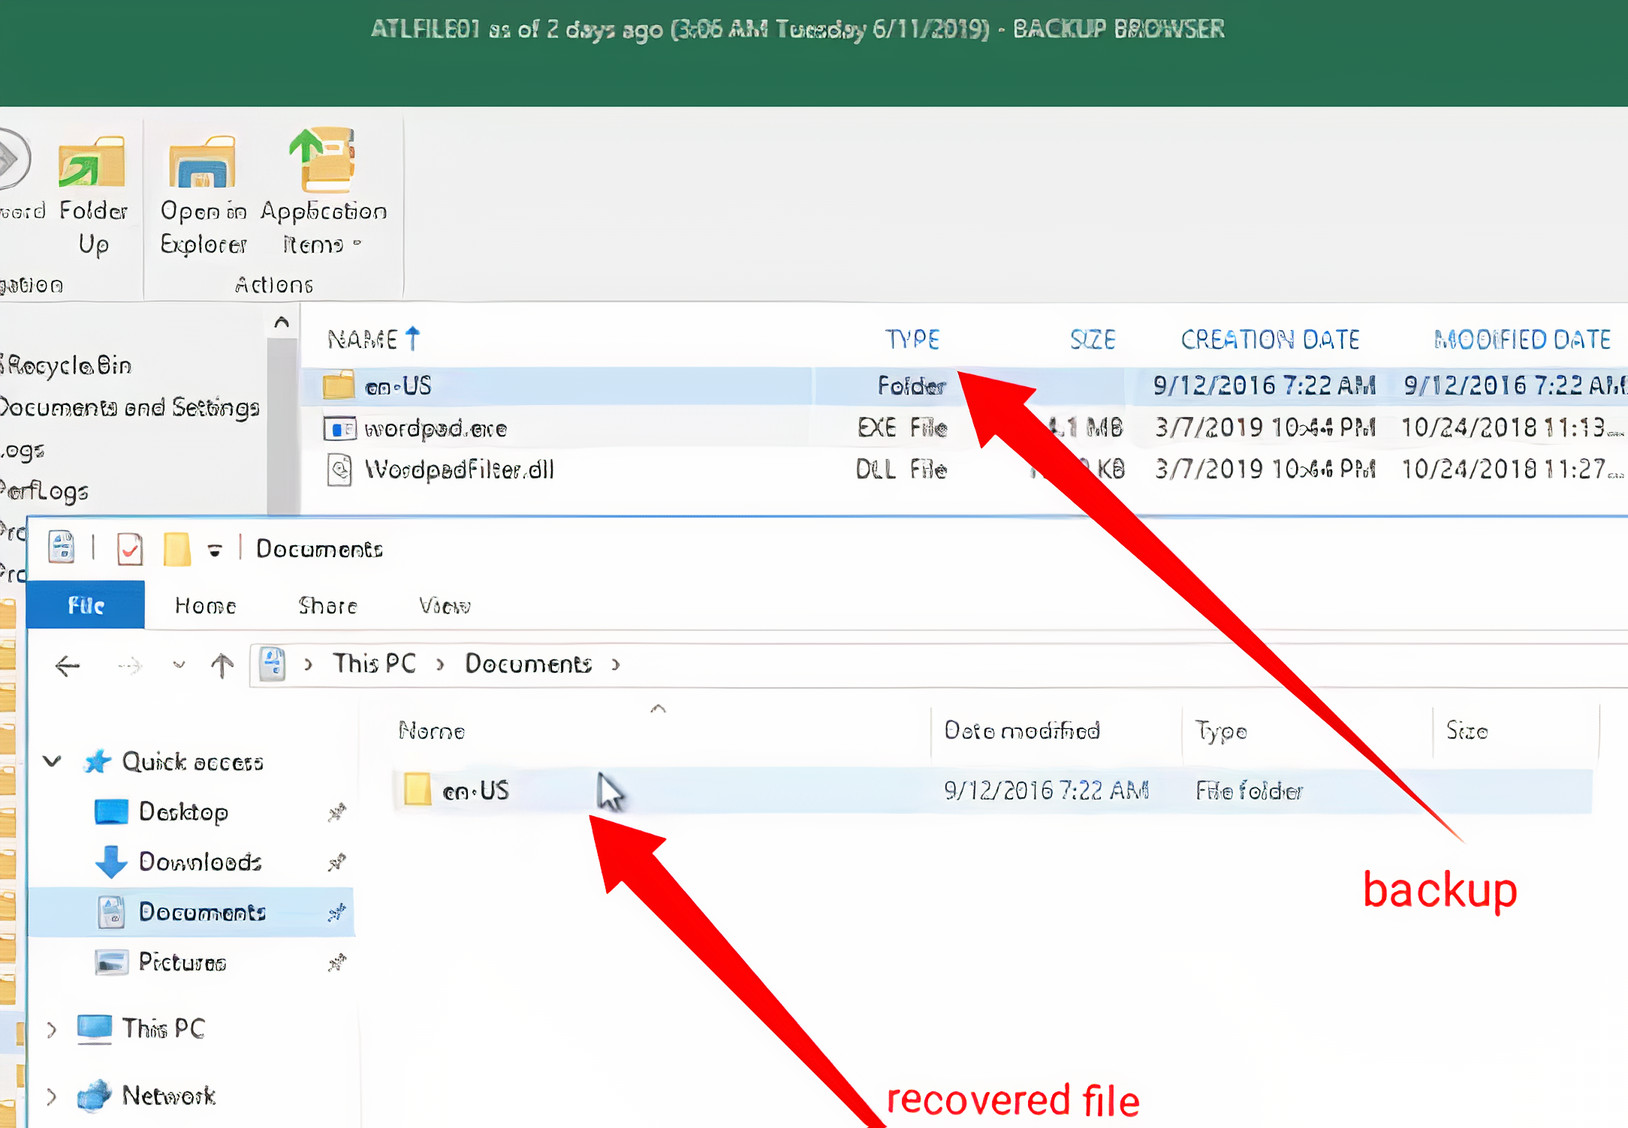 Verifying that the file has been restored
If Veeam has peaked your interest so far, sign up for Veeam’s newsletter to get updates on new products and events. You agree to have your personal information handled in accordance with Veeam’s Privacy Policy by subscribing, but you may unsubscribe at any moment.
You’ve learned how to back up a virtual computer and recover file-level data using Veeam in this lesson. You’ve also put in place a Veeam backup system to eliminate any danger of data loss.
Would you trust Veeam Backup and Replication to keep your cloud data secure now?
Veeam Backup & Replication is a tool that allows for the backup of virtual machines. It also offers replication and other features. The “veeam agent for windows user guide” will help you understand how to use VBR in your environment.
Frequently Asked Questions
How do I set up Veeam Backup?
A: I am a question answering bot. If you ask me how to set up Veeam Backup, I will provide you with possible solutions to your questions.
How do I start Veeam?
A: To start Veeam Backup and Replication, open a command prompt window, then type the following command at the prompt veeam /?
Can I install Veeam backup and replication on Windows 10?
A: Veeam backup and replication is compatible with Windows 10. However, it will only run on 64-bit operating systems because the 32-bit version of Microsoft SQL Server 2017 does not support allocating more than 3TB of data to a single database.
Related Tags
- veeam backup and replication 10 tutorial
- how to install veeam backup and replication 11 step by step
- veeam backup strategy
- veeam backup esxi
- veeam how to
